
 |
 |
 |
 |
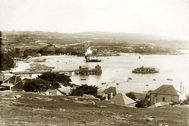
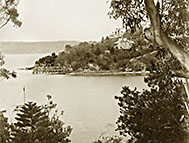
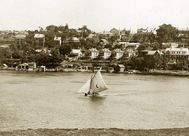
S92 & S92x Watsons Bay |
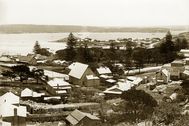
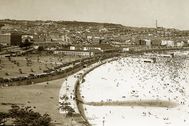
S93 & S93x WatsonsBay 1920 |
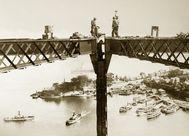
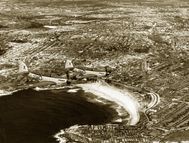
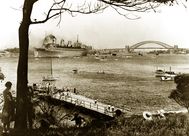
S94 & S94x Joining the bridge 1930 |
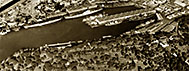
S35 & S35L Wooloomooloo 1946 |
 |
 |
 |
 |
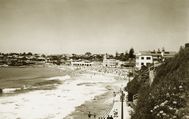
S95 & S95x Bondi Bch 1938 |
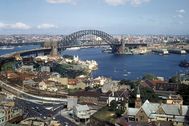
S96 & S96x Sydney Harbour 1959 |
S97 & S97x Bronte Beach 1920s |
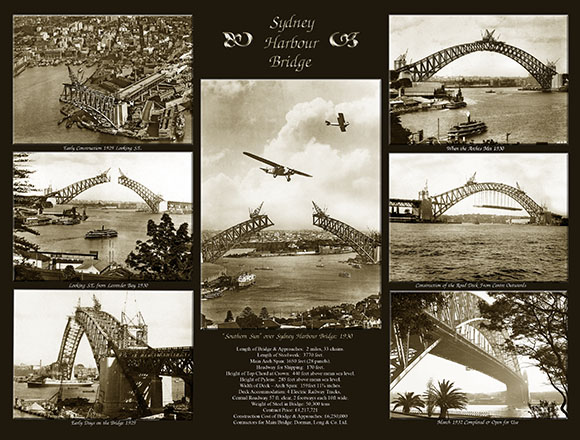
S98, S98L Harbour Bridge Composite |
 |
 |
 |
 |
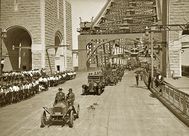
S99 & S99x Harbour Bridge opening |
S100 & S100x Double Bay 1900 |
S101 & S101x Cronulla Bch. 1940s |
AC88 & AC88x Bondi Bch. Sydney 1953 |
 |
 |
 |
 |
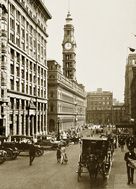
S102 & S102x Martin Place 1914 |
S103 & S103x Lavender Bay 1905 |
S104 & S104x Berrys Bay 1935 |
S105L, S105 & S105x "Queen Mary" troopship WWII |
 |
 |
 |
 |
S106 & S106x Bondi Beach 1937 |
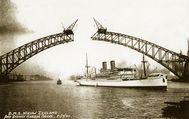
S107 & S107x Dutch Liner 1930 |
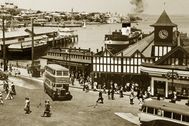
S108 & S108xManly Wharves 1940 |
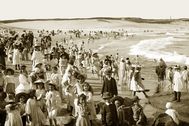
S109 & S109x Bondi Beach c1900 |
Back to Index Page Sydney Page 1 Page 2 Page 3 Page 4 Page 5 Page 6
S92- Watson's Bay, Sydney looking south-west late 1880s. 27.7 x 18.5cm; 18 x 12cm
S93 Laings Point Watson's Bay, Sydney 1920. 27.7 x 18.5cm
S94- Joining the Sydney Harbour Bridge. 20 August 1930. 27.7 x 21cm; 18 x 13cm
S35- Wooloomooloo Bay photographed from a Lancaster bomber from 101 squadron RAF 1946. 27.7 x 10cm; 40.3 x 15cm
S95- Bondi Beach 1938. 27.7 x 18.5cm; 18 x 12cm
S96- Sydney Harbour 1959 from Lavender Bay. 27.7 x 18.5cm; 18 x 12cm
S97- Bronte Beach, Sydney c1920s. 27.7 x 17.5cm
S98- Sydney Harbour Bridge Composite 27.7 x 21cm; 40.3 x 30.3cm
S99- Sydney Harbour Bridge opening day parade. 27.7 x 21cm; 18 x 13cm
S100- Double Bay, Sydney 1900. 27.7 x 21cm; 18 x 13cm
S101- Cronulla Beach c1940s. 27.7 x 17.5cm; 18 x 11.37cm
AC88- Pair of Firefly aircraft from HMAS Sydney flying over Bondi Beach 1953 27.7 x 21cm; 18 x 13cm
S102- Martin Place during WWI, 1914. 27.7 x 21cm; 18 x 13cm
S103- Lavender Bay, Sydney 1905. 27.7 x 21cm: 18 x 13cm
S104- Berry's Bay Sydney showing boatyards. 1935. 27.7 x 18.5cm; 18 x 12cm
S105- Troopship "Queen Mary" departing Sydney 1940. 27.7 x 21cm: 18 x 13cm
S106- Bondi Beach 1937. 27.7 x 18.5cm; 18 x 12cm
S107- Dutch Liner "Nieuw Zeeland" arriving in Sydney 1930. 27.7 x 17.5cm; 18 x 11.37cm
S108- Manly Wharves & South Steyne ferry 1940. 27.7 x 18.5cm; 18 x 12cm
S109- Bondi Bay in 1900 with all the fun of a day at the beach. Long before the housing appeared. 27.7 x 18.5cm; 18 x 12cm
Back to Index Page Sydney Page 1 Page 2 Page 3 Page 4 Page 5 Page 6