
 |
 |
 |
 |
|
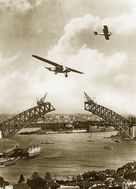
S1L, S1 & S1x Bridge construction 1930
|
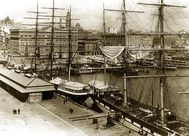
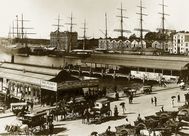
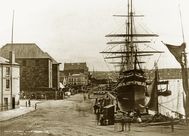
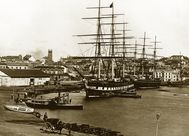
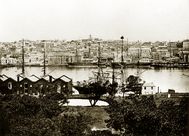
S2 & S2x Circular Quay 1900
|
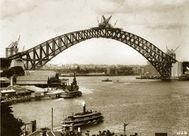
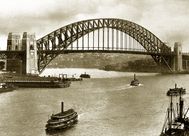
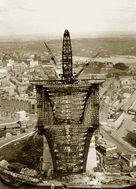
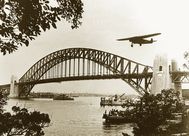
S3 & S3x Harbour Bridge 1930
|
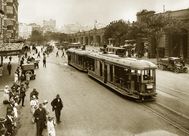
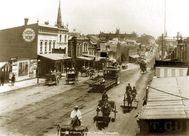
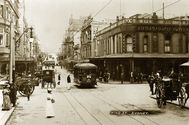
S4 & S4x Pitt St 1920s
|
 |
 |
 |
 |
|
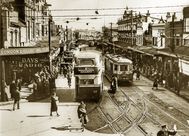
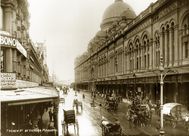
S5 & S5x Market St. 1913
|
S6 & S6x Circular Quay 1900
|
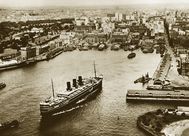
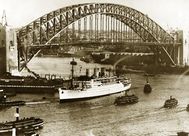
S7 & S7x The Bridge 1932
|
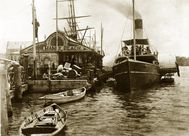
S8 & S8x Manly Ferry
|
 |
 |
 |
 |
|
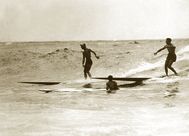
S9L, S9 & S9x Bronte Beach 1940
|
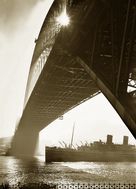
S10 & S10x Bridge construction 1930
|
S11 & S11x Pitt St Circular Quay 1871
|
S12 & S12x Broadway 1900
|
 |
 |
 |
 |
|
S14 & S14x Bondi Junction
|
S15 & S15x Circular Quay 1866
|
S16L, S16 & S16x Queen Victoria Building
|
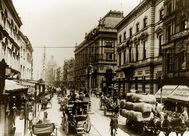
S17 & S17x George St. 1900
|
 |
 |
 |
 |
|
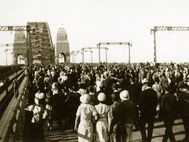
S18 Opening Day 1932
|
S19& S19x Circular Quay 1934
|
S20 & S20x Bridge 1932
|
S21& S21x Bridge 1932
|
 |
 |
 |
 |
|
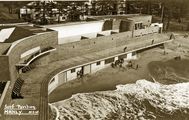
S22 & S22x Manly Surf Club
|
S23 & S23x Manly Surf Club
|
S24x "Southern Sky" over Sydney
|
S25 & S25x King & George St.
|
 |
 |
 |
 |
|
S26 & S26x Bridge 1932
|
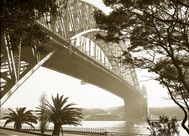
S27 & S27x Bridge 1932
|
S28 & S28x Circular Quay c1900
|
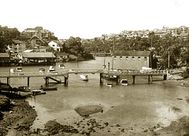
S29 & S29x Mosman Bay 1930
|
Sydney Page 1 Page 2 Page 3 Page 4 Page 5 Page 6
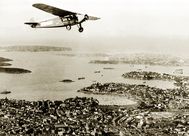
S1- Sydney Harbour Bridge/Planes. Amy Johnson onboard Kingsford Smith's "Southern Sun" (25.4x20.6, 18x14.6
S2- Circular Quay1900 with customs house 27.7x21
S3- Sydney Harbour Bridge constr. 1930 (25.7x20.4; 18 x 13)
S4- Pitt St. Sydney near Central Station 1920s 27.7x21; 18 x 13
S5- View of Market Street, near Pitt Street c.1913 27.7x21; 18 x 13
S6- Circular Quay 1900 N.E. Sailing ships & ferries 27.7x21; 18 x 13
S7- Sydney Harbour Bridge 1935 (25.7x20.4; 18 x 13)
S8- Royal Alfred Steam Ferry at Manly wharf. 27.7x21; 18 x 13
S9- Bronte longboard surfers1940. 27.7x21; 18 x 13
S10- View from pulley-wheels of north side creeper-crane (jibbed right out) (25.4x20.3) looking into box section of south side arch, Sydney Harbour Bridge May 1930 27.7x21; 18 x 13
S11- Sobraon, Pitt St. Sydney, 1871 Northern end of Pitt Street which formed the western shore of Circular Quay. 27.7x21; 18 x 13
S12- George St. Sydney, 1900 (west George/Broadway) 27.7x21; 18 x 13
S14- Bondi Junction 1940 27.7x21; 18 x 13
S15- "Great Victoria" Circular Quay 1866 Shows Sydneys Circular Quay in the 1860s. Looking SW into town 27.7x21; 18 x 13
S16- Victoria Markets, George St. Sydney, (Queen Victoria Building) 1900 (27.7x21; 18 x 13)
S17- George St. Sydney Heavy Traffic 1900 27.7x21; 18 x 13
S18- Harbour Bridge opening pedestrians walking over. 8x6" 20.3x15.2
S19- Circular Quay Sydney 1934 27.7x21 Government House and the Botanical Gardens on the left, through the Quay, down Pitt St at right to Campbells Cove,
S20- Southern Cross over Harbour Bridge 1932 27.7x21; 18 x 13 Charles Kingsford Smith's flight low over the bridge at it's opening created another attraction
S21-Cruise liner approaching Circular Quay w/Harbour Bridge behind 1932 27.7x21; 18 x 13
S22- Manly Beach, Sydney with old shark tower in foreground c1930s 27.7x17.5; 18 x 11.6cm
S23- Manly Surf Pavilion, Sydney c1930s 27.7x17.5; 18 x 11.6cm
S24- Kingsford Smith's ANA aircraft, "Southern Sky" (Avro 10) over Sydney Harbour 1930 18x13
S25- King & George St. Sydney c1880s Corner of King and George Streets during the early electric days in the late 1800s.27.7x18.2
S26- Harbour Bridge with cruise liner passing beneath late 1930s. A Frank Hurley photo. 27.7x19
S27- Harbour Bridge looking north from the park at the base of the south pylon 1930s. A Frank Hurley photo. 27.7x21; 18 x 13
S28- Circular Quay looking west towards the Pitt Street wharves c1900 27.7x21; 18 x 13
S29- Mosman Bay, Sydney c1930s27.7x21; 18 x 13
Sydney Page 1 Page 2 Page 3 Page 4 Page 5 Page 6